
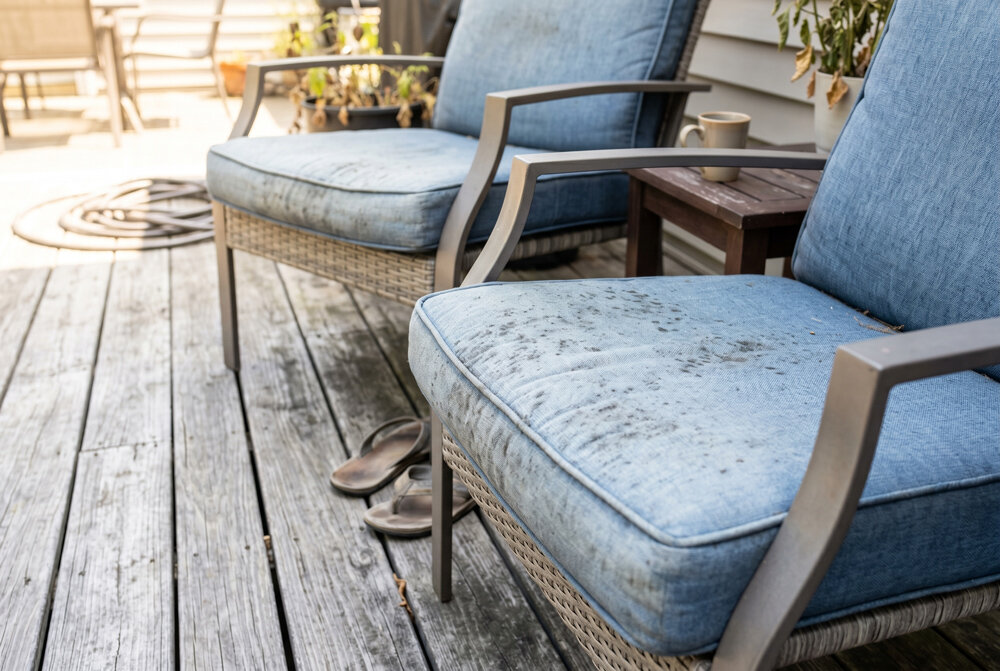
 Last summer, I pulled my patio cushions out of storage and immediately regretted not dealing with them properly the fall before. Mildew spots, a faint musty smell, and a couple of mystery stains that had set in over winter — not exactly what you want to kick off the season with. After a lot of trial and error (and one cushion that unfortunately didn’t make it), I put together a cleaning routine that’s actually stuck. So if your outdoor cushions are looking rough right now, you’re in the right place.
Before we get into the step-by-step stuff, it’s worth mentioning: the cleaning method you’ll use depends a lot on the cushion’s fill material and fabric. If you’ve got a custom bench cushion with a thick foam insert, for example, the approach is going to look different from thin, poly-filled chair pads. Keep that in mind as we go through this.
Why Outdoor Cushions Get So Dirty (and Why It Matters)
Outdoor cushions are exposed to a brutal combination of elements — UV rays breaking down fibres, moisture seeping into fill, pollen and dust settling into the weave, and the occasional bird deposit or food spill. Even “weather-resistant” fabrics aren’t fully immune. The dirt and organic matter that accumulate create the ideal environment for mould and mildew to take hold, especially in humid climates.
Here’s the thing about mildew: once it’s established in a cushion’s foam core, surface cleaning won’t fix the problem. You can scrub the outside all you want, but if the inside is compromised, the smell and the staining will keep coming back. That’s why prevention and prompt cleaning matter more than most people realise.
What You’ll Need Before You Start
You don’t need any speciality products for most cleaning jobs. What works well:
- Mild dish soap — Dawn or any basic degreasing formula works great
- White vinegar — essential for mildew treatment, not optional if you see any spotting
- Borax (optional but effective) — especially useful for heavy mould situations
- A soft-bristle scrub brush — avoid stiff wire brushes that damage fabric weave
- Garden hose with spray nozzle — good water pressure matters for rinsing
- Bucket and warm water
- Old towels for blotting
For cushions with removable covers, check the care label before doing anything else. Most outdoor fabric covers (Sunbrella, olefin, acrylic blends) can handle a mild hand wash or even a gentle machine cycle. The foam insert rarely should go in a machine — more on that below.
Step-by-Step: How to Clean Outdoor Cushions
Step 1 — Start with a Dry Brush-Down
This step gets skipped constantly, and it makes the rest of the job harder. Before you add any water, take a dry brush and work over the entire cushion surface to knock loose dirt, dried debris, pollen, and spider webs. Do this outside so you’re not just redistributing the dust. A quick shake helps too.
If the cushion has visible mould spots — black, green, or greyish fuzzy patches — do this step wearing a simple dust mask. Disturbing dry mould releases spores into the air, and it’s not great to breathe in.
Step 2 — Make Your Cleaning Solution
For general dirt and grime, mix about a tablespoon of mild dish soap into a gallon of warm water. Stir it until you get a light foam going.
If mildew is part of the picture, add a quarter cup of white vinegar to that same bucket. Vinegar is genuinely effective against mildew — the acidity disrupts the fungal structure. For really bad cases, some people use a diluted bleach solution (one cup bleach per gallon of water), but only do this on fabrics you’ve confirmed are bleach-safe. Many outdoor fabrics, including Sunbrella, are bleach-tolerant, but check first.
Note: Never mix bleach and vinegar. They react to produce chlorine gas, which is harmful. Pick one approach or the other.
Step 3 — Scrub the Fabric Surface
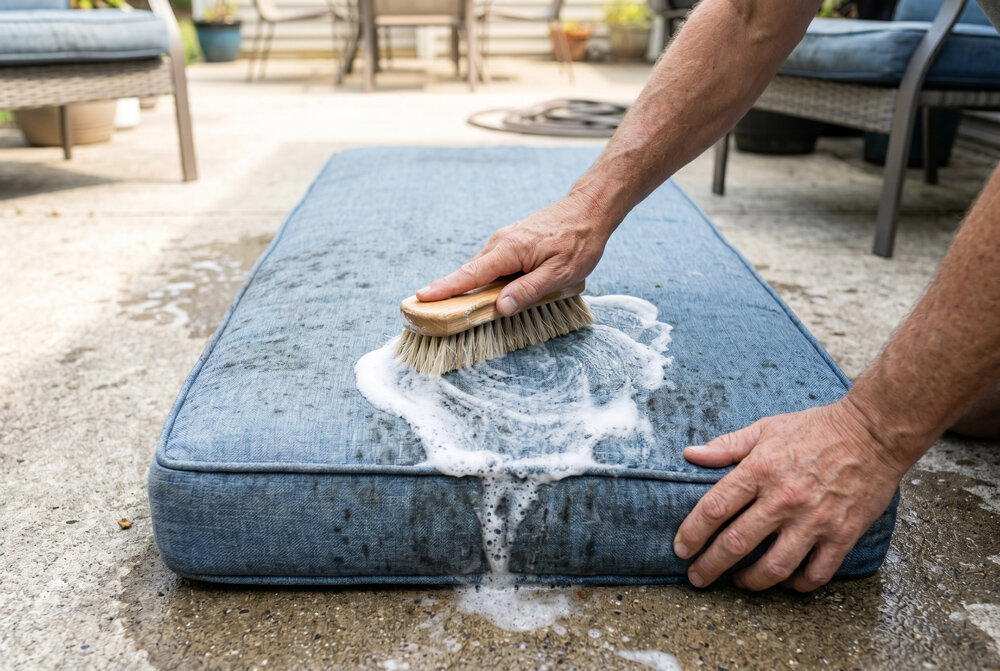
Apply your cleaning solution generously to the cushion surface and use your soft brush to work it in using circular motions. Give extra attention to stained areas, seams (where mildew loves to hide), and any piping or trim.
Let the solution sit for about 10–15 minutes before scrubbing again. For stubborn stains, a paste of baking soda and a small amount of dish soap works well — apply it directly, let it sit, then scrub. The mild abrasion from the baking soda helps lift surface stains without being harsh enough to damage most outdoor fabrics.
Step 4 — Rinse Thoroughly
This step is more important than most people give it credit for. Soap residue left in outdoor cushion fabric attracts dirt faster and can actually promote mildew growth over time. Use your garden hose at decent pressure and rinse until the water running off is completely clear — no suds, no colour.
Flip the cushion over and rinse the other side too, even if you didn’t scrub it. Rinse water migrates through the fill and needs to exit somewhere.
Step 5 — Dealing with the Foam Insert
This is where most guides leave you hanging. The foam inside an outdoor cushion absorbs a remarkable amount of dirty water during cleaning, and if it doesn’t dry properly, you’ve just created a mildew incubator.
Here’s my approach: after rinsing, stand the cushion on its edge (rather than laying it flat) so water can drain from the fill vertically. Then press down on the cushion firmly several times to squeeze excess water out — almost like kneading bread. You’ll see a surprising amount of grey water come out even after rinsing.
For really saturated cushions, wrapping them in old towels and pressing helps draw out more moisture before the drying phase.
Step 6 — Dry Completely Before Storing or Using
Outdoor cushions need to dry in moving air, ideally in direct sunlight. Lay them flat in a sunny spot and flip every hour or so. Thick cushions — anything over 3 inches — can take a full day or even longer depending on humidity and temperature.
Do not put a cushion back on furniture or into storage if there’s any doubt about whether the core is fully dry. Squeeze the centre of the cushion firmly — if you feel any coolness or moisture, it needs more time. Mildew can establish itself in a damp foam core within 24–48 hours.
How to Clean Outdoor Cushions with Specific Fabric Types
Sunbrella and Solution-Dyed Acrylic Fabrics
These are the gold standard for outdoor use and are the most forgiving to clean. Sunbrella specifically can handle diluted bleach (up to 1 cup per gallon of water) without colour damage. The fabric is solution-dyed, meaning the colour goes all the way through the fibre, so it won’t bleach out unevenly. Rinse well after any bleach use.
Polyester and Olefin Blends
Very common in mid-range outdoor furniture. These respond well to the soap-and-vinegar method. They’re somewhat mildew-resistant but not immune. Avoid hot water, which can cause these synthetics to pucker or distort at seams.
Canvas and Cotton Blends
Less common outdoors these days but still around. These absorb water more readily and take longer to dry. They’re also more prone to shrinkage, so cool or lukewarm water is safer than hot. Don’t machine-wash unless the care label specifically says it’s fine.
Cushions with Removable, Washable Covers
If the cover unzips, your life just got easier. Remove it, wash separately (cold/gentle cycle for most outdoor fabrics), and clean the foam insert independently. The foam can be rinsed under the hose, gently squeezed, and set to dry. Make sure both components are fully dry before reassembling — zipping a damp cover onto a foam insert is a recipe for mildew problems.
Tackling Specific Problem Stains
Mould and Mildew
White vinegar is the first line of defence. Spray undiluted vinegar directly onto the affected area, let it sit for 20–30 minutes, then scrub and rinse. For deep mildew that’s gotten into the foam, you may need to repeat this process two or three times.
If vinegar isn’t cutting it, try a borax solution: half a cup of borax dissolved in a quart of hot water. Apply, scrub, let it dry on the fabric (don’t rinse immediately — the borax continues working as it dries). Rinse after about an hour.
Rust Stains
These appear when metal furniture hardware or legs contact wet fabric. Rust stains are notoriously stubborn. A commercial rust remover designed for fabric works best, but apply carefully and test on an inconspicuous area first. Lemon juice and salt is a gentler option — apply the paste, let it sit in the sun (the UV activates the citric acid), then rinse. Results vary.
Bird Droppings
Let it dry completely before attempting removal — scraping wet droppings smears the mess deeper into the fabric. Once dried, scrape off the solid portion with a plastic scraper or old credit card, then treat the remaining stain with the standard soap solution.
Sunscreen and Oil-Based Stains
These are among the trickiest. A small amount of dish soap applied directly (not diluted) to the stain and worked in with a soft cloth is usually the best approach. Rinse well. You may need two or three passes for sunscreen stains in particular, which tend to bond with synthetic outdoor fabrics.
Preventive Maintenance That Makes Cleaning Easier
Honestly, the best cleaning advice is the stuff that reduces how often you need to deep clean at all. A few habits that make a genuine difference:
- Shake cushions out weekly during peak use season — it takes 30 seconds and prevents the buildup that leads to embedded staining.
- Bring cushions inside during rain when possible — even “weather-resistant” fabrics dry better when they weren’t saturated in the first place.
- Use patio furniture covers — covers aren’t glamorous but they do protect against pollen, UV fading, and bird droppings between uses.
- Store properly in the off-season — a breathable storage bag in a dry garage or basement does the job. Plastic bags trap moisture and encourage mildew.
- Spot-clean immediately — a food spill treated within the first hour is almost always easier to remove than one that’s set for a week.
When to Replace Rather Than Clean
Sometimes cleaning just isn’t the answer anymore, and it’s worth being honest about that. Signs a cushion has reached end-of-life:
- Persistent musty odour that returns even after thorough cleaning and complete drying
- Foam that’s crumbled, chunked, or lost its support — cleaning won’t fix structural breakdown
- Mould that’s penetrated so deeply into the fill that the fabric surface looks clean, but the smell is still there
- Fabric that’s UV-degraded to the point where fibres are breaking down under scrubbing
If you’re in replacement territory, it’s actually a good opportunity to think about what would work better the second time around. Outdoor cushions with removable, washable covers are dramatically easier to maintain. Fill materials matter too — some foam types resist moisture absorption better than others, and that makes a real difference in humid climates.
Quick Reference: Cleaning by Situation
| Situation | Method | Key Note
|
|---|---|---|
| Light surface dirt | Soap + water, soft brush | Rinse thoroughly |
| Mildew spots | White vinegar, let sit 20 min | May need multiple passes |
| Heavy mold | Borax solution or diluted bleach (check fabric first) | Never mix bleach + vinegar |
| Oil/sunscreen stains | Undiluted dish soap, work in, rinse | May need 2–3 rounds |
| Bird droppings | Let dry, scrape, then soap + water | Don’t scrub wet |
| Rust stains | Lemon + salt paste or commercial rust remover | Test on the hidden area first |
Final Thoughts
Cleaning outdoor cushions isn’t complicated, but it does require a bit of patience — especially that drying step, which people constantly rush and then wonder why the mildew came back. The whole process, done right, takes a few hours of active work spread over a day of drying time. That’s genuinely not bad for extending the life of outdoor furniture that can cost a significant amount to replace.
One thing I’ve come to appreciate is how much the quality of the cushion itself affects how cleanable it is. Well-constructed outdoor cushions with better foam and tighter fabric weaves just clean up easier and hold up longer. If you’ve been fighting a losing battle with cheap cushions that keep mildewing up no matter what you do, that might be the real answer.
Hopefully this guide gives you a clear path forward — whether that’s rescuing your current cushions or setting yourself up for a lower-maintenance setup going forward. Either way, a few hours of cleaning work now beats starting the season with furniture you don’t want to sit on.